This guide walks you through registering for upSync, selecting a plan, and completing the sign-up process.
Before You Begin
You will need the following before signing up:
- A company name and contact email address.
- A payment card if you are not signing up for a free trial plan.
Step-by-Step Registration
- Go to upsync.smartit.app and click the Register or Get Started button.
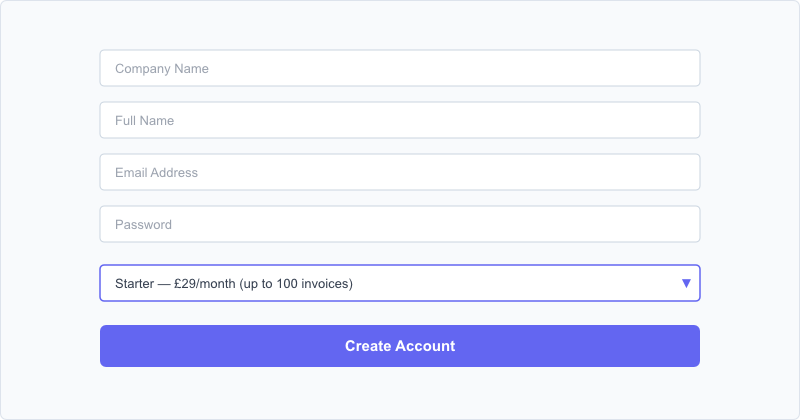
- Enter your Company Name, Full Name, and Email Address.
- Choose a Password and confirm it.
- Select your Plan from the dropdown list. Each plan shows the monthly price and the maximum number of invoices you can sync per month. See Choosing a Plan for a full comparison.
- If you have a Discount Code, enter it in the discount code field. The system will validate the code and show you the discounted price.
- If you selected a paid plan, a card payment field will appear. Enter your card details securely. upSync uses Stripe for all payment processing — your card details are never stored on our servers.
- Click Create Account. Your account will be created and you will be taken straight to the dashboard.
Note: If you selected a trial plan, no payment details are required. You will be prompted to add a payment method before your trial ends if you wish to continue using upSync.
After Registration
Once your account is created, the dashboard will display a Getting Started checklist showing the remaining setup steps:
- Connect your Autotask account
- Connect your Xero organisation
Follow the checklist links or use the navigation menu to complete these steps. See Connecting Autotask and Connecting Xero for full instructions.
Logging In
To log back into your account, go to upsync.smartit.app/login and enter your email address and password. Tick Remember me to stay logged in on your device.
Forgotten Password
If you forget your password, click Forgot your password? on the login page. Enter your email address and you will receive a password reset link. The link expires after 60 minutes.